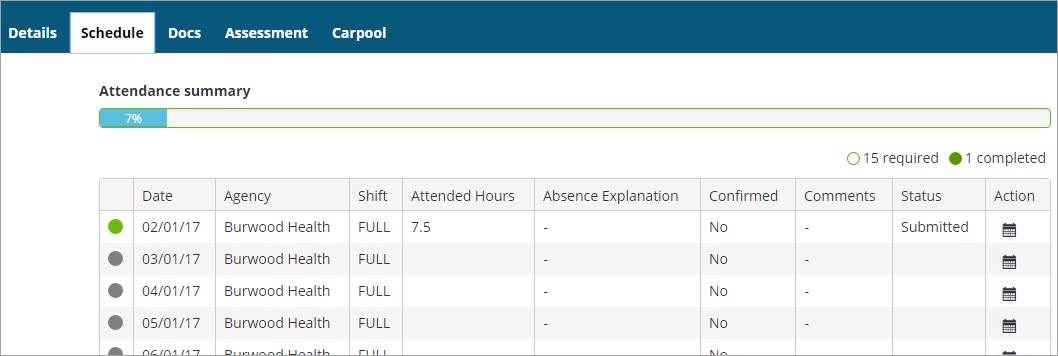
Tabs of confirmed placements screen - Schedule
The Schedule tab lists your placement schedule:
- the indicator in the left column turns from grey to green for submitted timesheets, and turns to red if you record an absence on a timesheet.
If you have to complete timesheets, you access them from here by clicking the timesheet icon in the Action column.

Add a day to your schedule
You can add one or more days to your schedule (if this functionality has been activated by your placement coordinator). For example, you might not have been given a schedule at all for this placement because it’s up to you to add your days, or you might have a schedule but you need to add a day to make up for a day that you were absent.
- At the bottom of the Schedule tab click Add Day to Schedule (if available).
- In the Add Day to Schedule dialog enter the date and (if required) the start and end times and click Save. The day is added to your schedule.
- Repeat Steps 1 and 2 to add more days as required.
Delete a day you’ve added
If you’ve added a day and your placement uses timesheets you can delete that day if necessary.
- On the Schedule tab locate the day you want to delete and click the timesheet icon .
- In your timesheet click Delete.
Mobile options:

