InPlace - Use the Calendar
The InPlace Calendar lets you view your confirmed placements and any self-selectable placements you've nominated. It may also show your course-related engagements (classes, lectures, interviews and so on) imported from an external calendar if your institute uses one.
The Calendar offers you the option to sync your calendar data with your own external calendar (for example, a Google calendar).
Access the Calendar
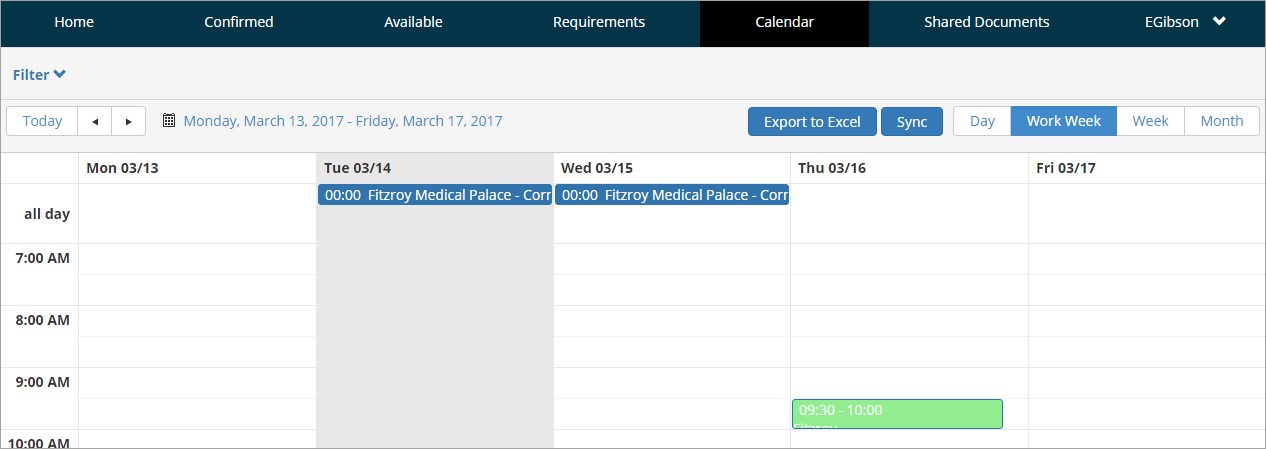
To open the Calendar click Calendar on the toolbar. The default view is Work Week.

- All your placements are shown in blue, nominated self-selectable placements are pink, and all non- placement engagements are green.
- In the Day and Week views all-day events (or ones where no specific time range has been set up) are shown at the top, in the all day section.
- In the Day and Week views the default calendar day starts at 7.00 AM and ends at 7.00 PM. However, you can click Show full day (bottom left corner) to see a 24-hour day. Click Show business hours to switch back again.
Perform some common actions
Do any of the following:
- switch your view to Day, Work Week, Week or Month by clicking the buttons in the top right corner.
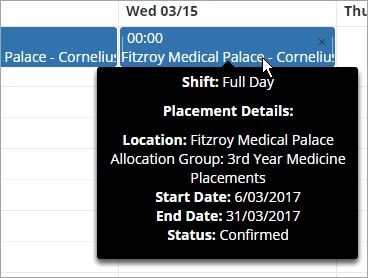
- hover your mouse over a placement or engagement to view more details in a tooltip.

- To add a new engagement:
- double-click a date to open the Event dialog
- enter the details and click Save.
Note: If you need to edit it later, double-click the entry to open the Event dialog again.
- To export the calendar contents to Excel:
- click Export to Excel to export the Calendar's List view as an Excel file. The file is downloaded to the default location on your computer.
Notes:
- The data that's exported depends on what view you currently have open. For example, if you're using the Week view, only data for that week is exported.
- On a mobile device the export behaviour may vary.
Perform a Calendar sync
You can sync your placement calendar data with an external calendar. The data is exported as an iCalendar file (iCalendar.ics), which is compatible with external calendars such as Google, Yahoo, Outlook and iCal.
- Click Sync on the Calendar.
- In the Sync your calendar dialog copy the URL provided.
- Enter the URL where required on your mobile device.
Note: Syncing instructions may vary across operating systems so you'll need to find and follow the steps that apply to your own device.

Mobile options:

