InPlace - Complete a timesheet
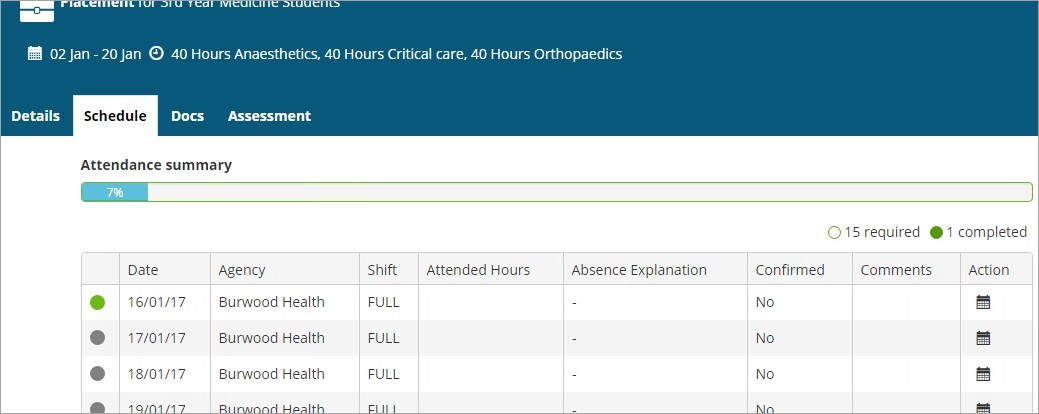
Follow the steps below if you need to complete a timesheet for each day of your placement schedule. You access timesheets from the placement’s Schedule tab.
Note: You can't submit timesheets for future dates.
Steps
1. Open the placement’s schedule using one of the following methods:
- click Confirmed on the toolbar, and then click the relevant placement on the Confirmed page and go to its Schedule tab.
- if you have overdue timesheets click the Outstanding Timesheets task in the To Do list on your Home page – you’re taken straight to the Schedule tab on the placement.

The Schedule tab lists all your placement dates. In the left column a green dot indicates any submitted timesheets and a red dot indicates any recorded absences.
Note: You may be allowed to add extra days to your schedule. See add a day to your schedule.

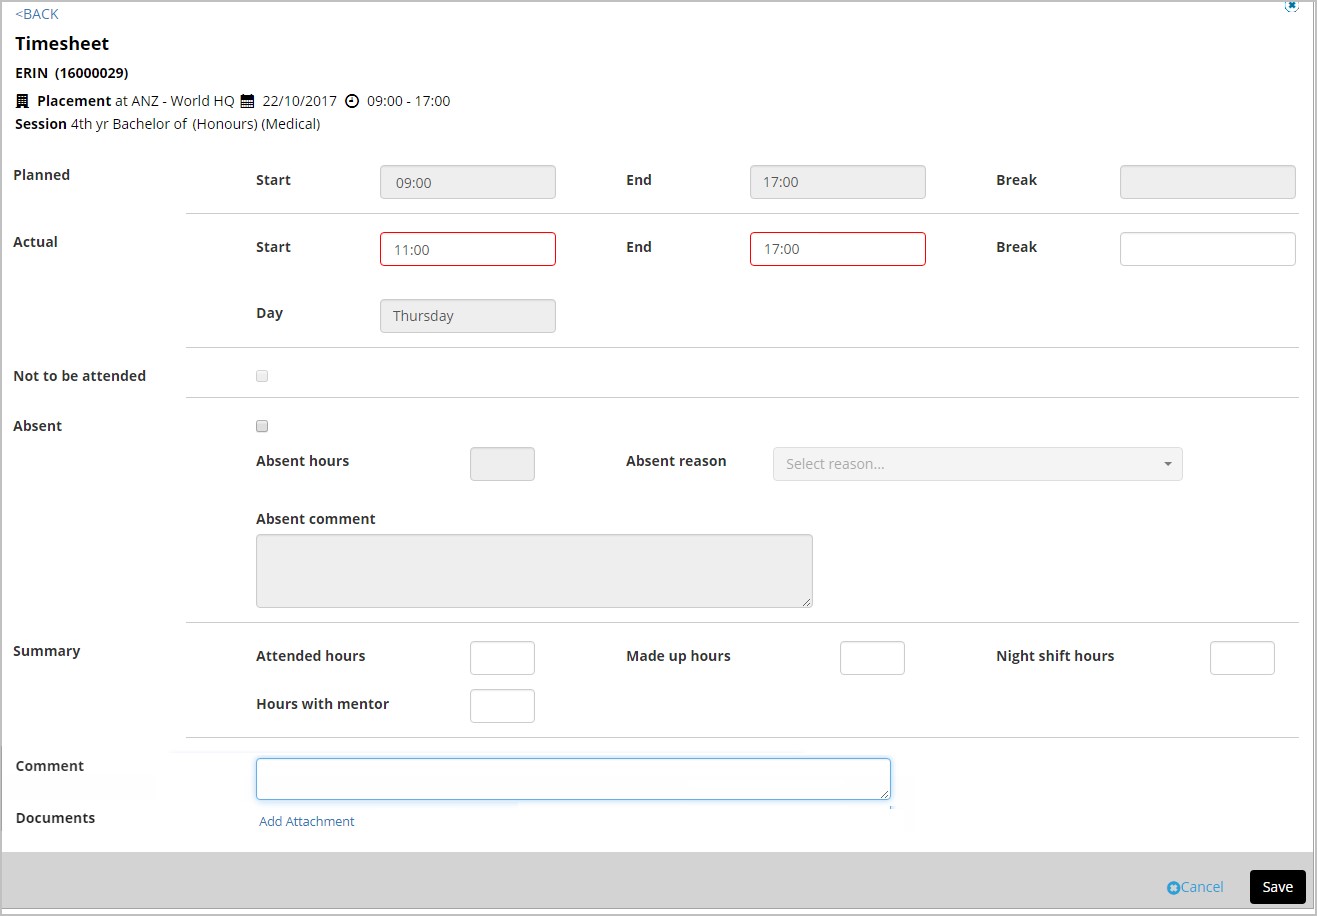
2. Find the timesheet you want to complete and click the timesheet icon in the Action column. The timesheet opens.

3. Enter the required information.
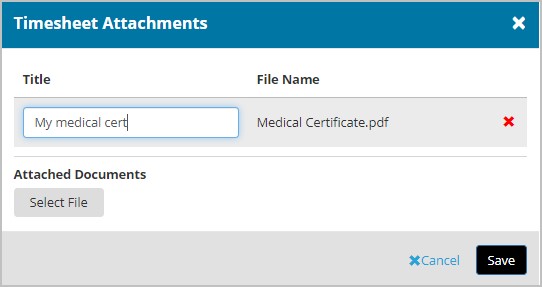
4. Click Add Attachment to upload any relevant document. For example, if you were absent, you might upload a medical certificate or supporting document.

5. Click Save to save and close the timesheet.
On the Schedule tab the number of hours you attended now appears in the Attended Hours column.
Mobile options:

